Midjourney has rapidly become one of the most powerful and popular AI tools for generating breathtaking images and, more recently, captivating short videos. If you’ve been curious about how to get started, you’re in the right place. This comprehensive tutorial will provide a foundational walkthrough of how to use Midjourney, covering everything from your first prompt to advanced parameters, ensuring you have the building blocks to bring your imagination to life.
Midjourney can generate a vast array of artistic styles from simple text prompts.
What is Midjourney?
Midjourney is a generative AI tool that turns your text (and image) prompts into unique, high-quality images and short videos. It operates through a polished web application and a long-running Discord bot. With its recent updates, like the V7 model and image-to-video features, Midjourney continues to be a state-of-the-art platform for creators, artists, and anyone looking to explore the frontiers of AI-powered art.
Quick Start Guide: How to Use Midjourney on the Web
Getting started with Midjourney’s web interface is incredibly straightforward. Here’s a simple step-by-step process to create your first image:
Go to Midjourney.com, sign in, and open the Create page (look for the create icon on the left sidebar).
In the prompt box at the top (which says “What will you imagine?”), type a description of the image you want to create.
Press Enter or click the send button. Midjourney will begin processing your request.
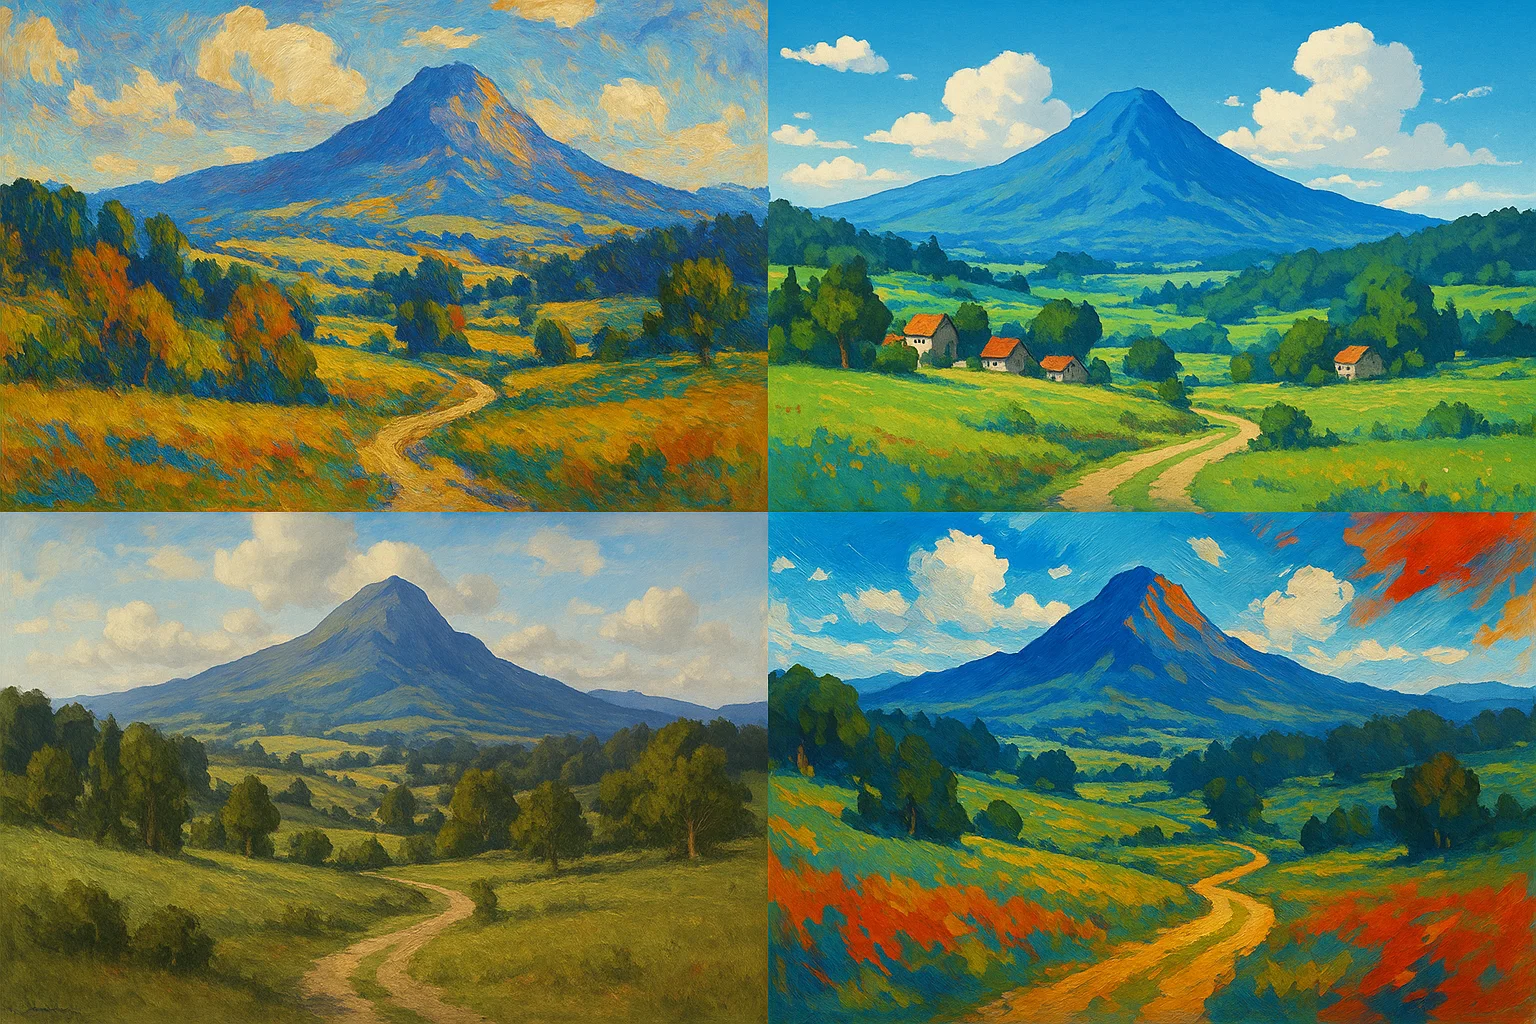
After a short wait, Midjourney will generate a 4-image grid based on your prompt.
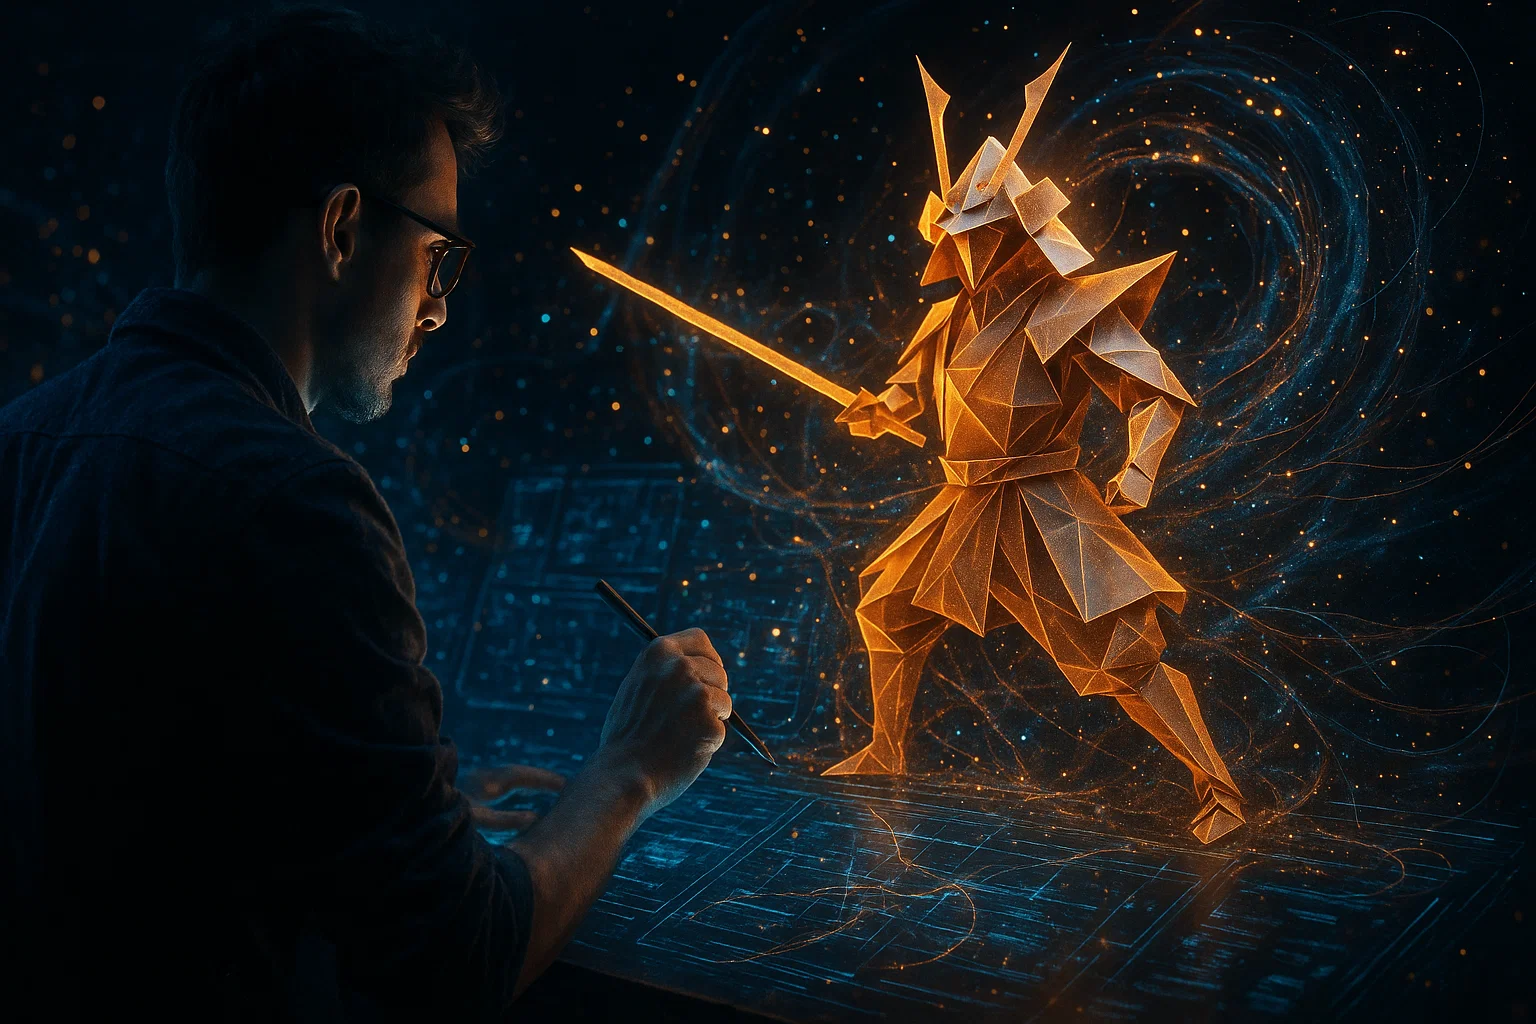
For example, using the prompt below creates a fascinating set of images:
“An origami-style combat scene from John Wick, where the origami Keanu Reeves, wielding a samurai sword in one hand and a pistol in the other, engages in a battle with a group of assassins.”
The AI will first show a blurry preview, which gradually sharpens into four distinct, high-detail options based on your creative direction.
Your initial prompt generates a grid of four unique variations to choose from.
Refining Your Creation: Vary, Upscale, and More
Once you have your initial 4-image grid, you have several powerful options to refine your artwork. When you hover over an image in the grid, you’ll see buttons to Vary (Subtle), Vary (Strong), and Animate. Clicking on a specific image tile will open it in a larger view with even more options.
Vary: Exploring New Possibilities
If you like the direction of one of your images but it isn’t quite perfect, the “Vary” function is your best friend. It creates a new grid of four images based on the one you selected.
Vary (Subtle): Makes minor, subtle changes to the image, keeping the overall composition and elements very similar. This is great for small tweaks.
Vary (Strong): Makes much more significant changes to the image. The composition, character poses, and background can change dramatically while still retaining the core concept.
Upscale: Adding Detail and Polish
When you’ve found an image you love, it’s time to upscale it. Upscaling creates a single, larger, higher-resolution version of your chosen image. This process often smooths out minor imperfections and adds finer details.
Upscale (Subtle): Creates a larger version that stays very true to the original small image.
Upscale (Creative): Upscales the image while also adding more details and making some creative changes, resulting in a more stylized final product.
To learn more about other AI art platforms, check out our reviews in the AI Tools & Reviews category.
Bringing Images to Life: Midjourney’s Video Animation
One of Midjourney’s most exciting new features is the ability to turn any static image into a short, animated video. After upscaling an image, you’ll find the Animate Image options.
You can choose between Low Motion and High Motion to control the amount of movement in the final video. The AI will then generate a short video clip (around 5 seconds) that brings your artwork to life with subtle or dramatic motion. You can even use the “Extend Video” feature to make the clips longer.
How to Use Midjourney – Tutorial Video
Mastering Prompts & Parameters
The key to getting great results from Midjourney lies in your prompts and the parameters you use.
Prompting Basics: Be Specific!
The more specific you are, the better. Don’t just say “a castle.” Instead, describe the subject, medium, lighting, mood, shot type, and era. For example: “A haunting medieval castle at dusk, shrouded in fog, cinematic lighting, photorealistic, wide-angle shot.” This level of detail gives the AI much more to work with.
A great way to learn is by using the Explore tab on the Midjourney website. You can see what the community is creating and, most importantly, view the exact prompts they used to achieve those results.
Parameters are added to the end of your prompt to control technical aspects like size and style. They always start with a double-hyphen (`–`).
--ar: This stands for Aspect Ratio. It controls the dimensions of your image. Examples include --ar 1:1 (square), --ar 16:9 (widescreen), or --ar 9:16 (vertical).
--s or --stylize: This parameter controls how artistically stylized your image is. The value ranges from 0 to 1000. A lower value sticks closer to your prompt, while a higher value gives Midjourney more creative freedom.
--chaos: This parameter (from 0-100) increases the variety and unpredictability of the initial image grid, leading to more unique and unexpected results.
Midjourney Pricing Plans
Midjourney offers several subscription plans. A key concept to understand is “Fast Mode” vs. “Relax Mode.” Fast Mode gives you results almost instantly but consumes your monthly GPU time. Relax Mode is slower but is unlimited on certain plans, which is perfect for extensive video creation.
Plan
Price (Monthly)
Key Inclusions
Basic
$10
Fast GPU time; images only (no Relax mode), SD video in Fast mode.
Standard
$30
More Fast time, HD video in Fast, images in Relax mode.
Pro
$60
Even more Fast time, Stealth Mode, unlimited Relax video (SD).
Mega
$120
Maximum Fast time, Stealth, unlimited Relax video (SD).
Note: Commercial usage is broadly permitted for all subscribers. Always check the official site for the most up-to-date pricing and terms.
The concept of intelligence ownership has been gaining traction in recent years, and for good reason. As Cisco has demonstrated, owning intelligence rather than renting it can be a game-changer for enterprises looking to scale their operations securely. According to a recent article by The Rundown AI, Cisco’s strategy to scale agents securely and reshape enterprise workflows is a prime example of this shift.
The Importance of Intelligence Ownership
Owning intelligence means having control over the data, algorithms, and insights that drive business decisions. This is particularly crucial in today’s fast-paced, data-driven world, where artificial intelligence and machine learning are becoming increasingly prevalent. By owning their intelligence, enterprises can ensure that their systems are secure, transparent, and aligned with their overall goals.
Scaling Agents Securely with Cisco
Cisco’s approach to scaling agents securely is centered around the idea of intelligence ownership. By developing and owning their own AI-powered agents, Cisco is able to ensure that their systems are secure, efficient, and tailored to their specific needs. This approach has allowed Cisco to reshape their enterprise workflows and improve overall productivity. As AWS and other cloud providers continue to evolve, the importance of owning intelligence will only continue to grow.
Cisco’s strategy is a great example of how owning intelligence can help enterprises scale their operations securely and efficiently. By taking control of their data and algorithms, companies can ensure that their systems are aligned with their overall goals and values.
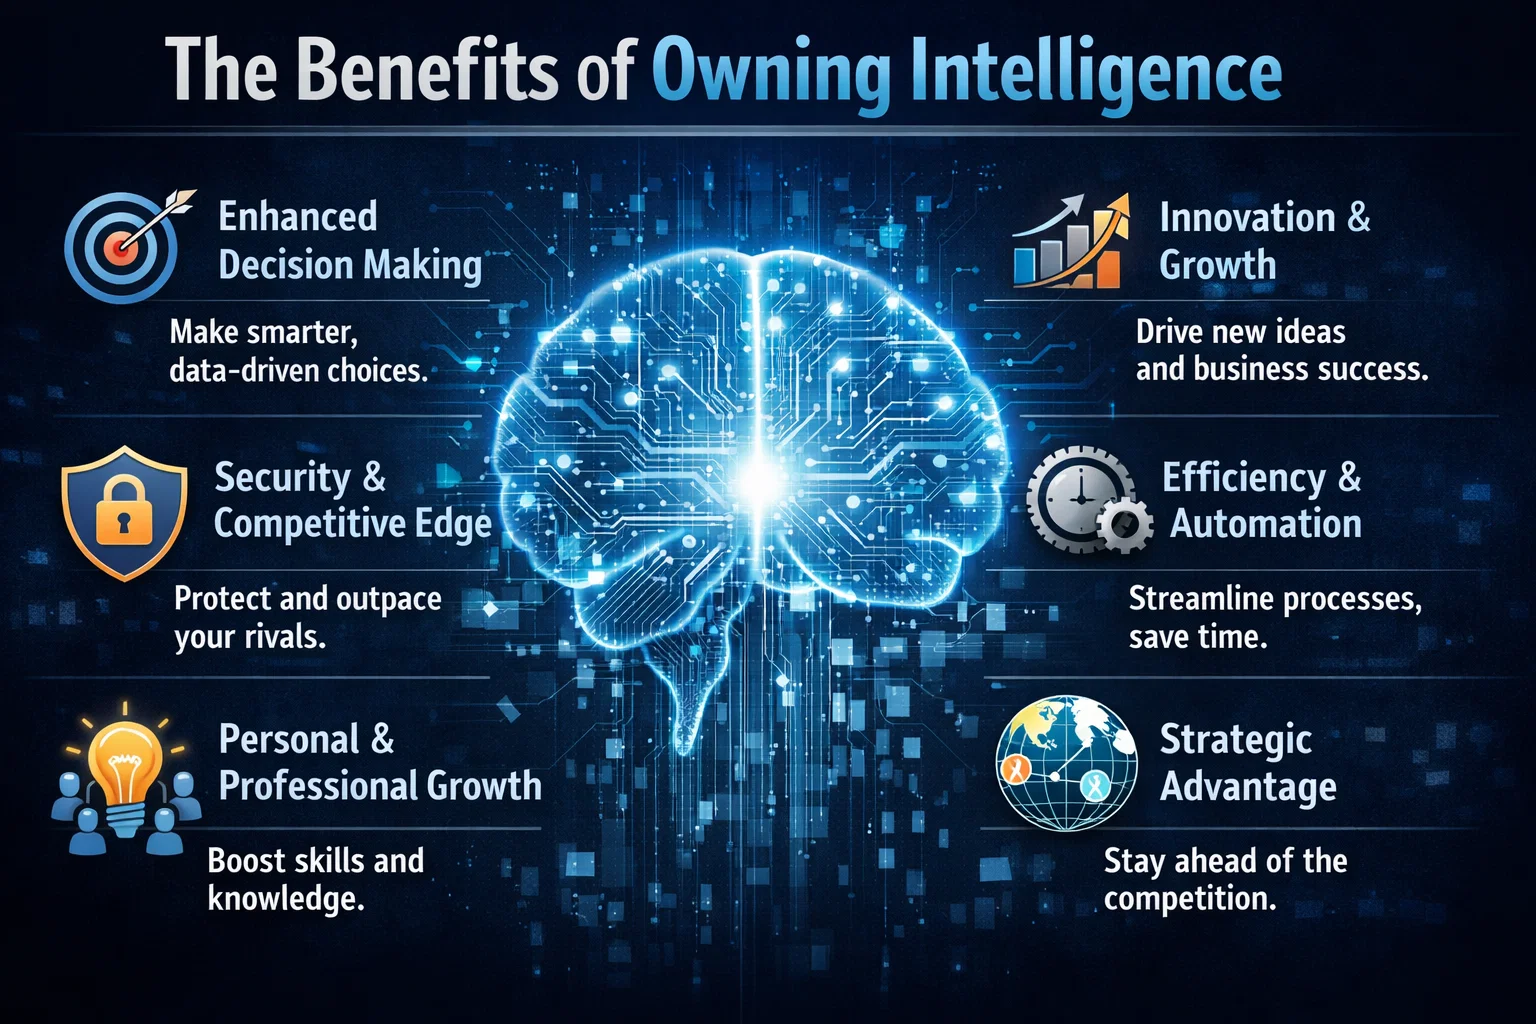
The Benefits of Owning Intelligence
So why should enterprises prioritize intelligence ownership? The benefits are numerous. For one, owning intelligence provides a level of control and transparency that is difficult to achieve with rented intelligence. It also allows enterprises to develop systems that are tailored to their specific needs and goals, rather than relying on generic, off-the-shelf solutions. Additionally, owning intelligence can help enterprises to improve their overall security posture, as they are able to develop and implement their own security protocols and measures.
In contrast, rented intelligence can be limiting and inflexible. When enterprises rely on rented intelligence, they are often at the mercy of the provider, with limited control over the data, algorithms, and insights that drive their business decisions. This can lead to a lack of transparency, security risks, and a general sense of disempowerment.
Real-World Applications
So what does intelligence ownership look like in practice? One example is the development of custom GitHub repositories, which allow enterprises to own and control their code and data. Another example is the use of Azure and other cloud platforms to develop and deploy custom AI-powered solutions. By taking control of their intelligence, enterprises can develop systems that are tailored to their specific needs and goals, and that provide a level of security, transparency, and efficiency that is difficult to achieve with rented intelligence.
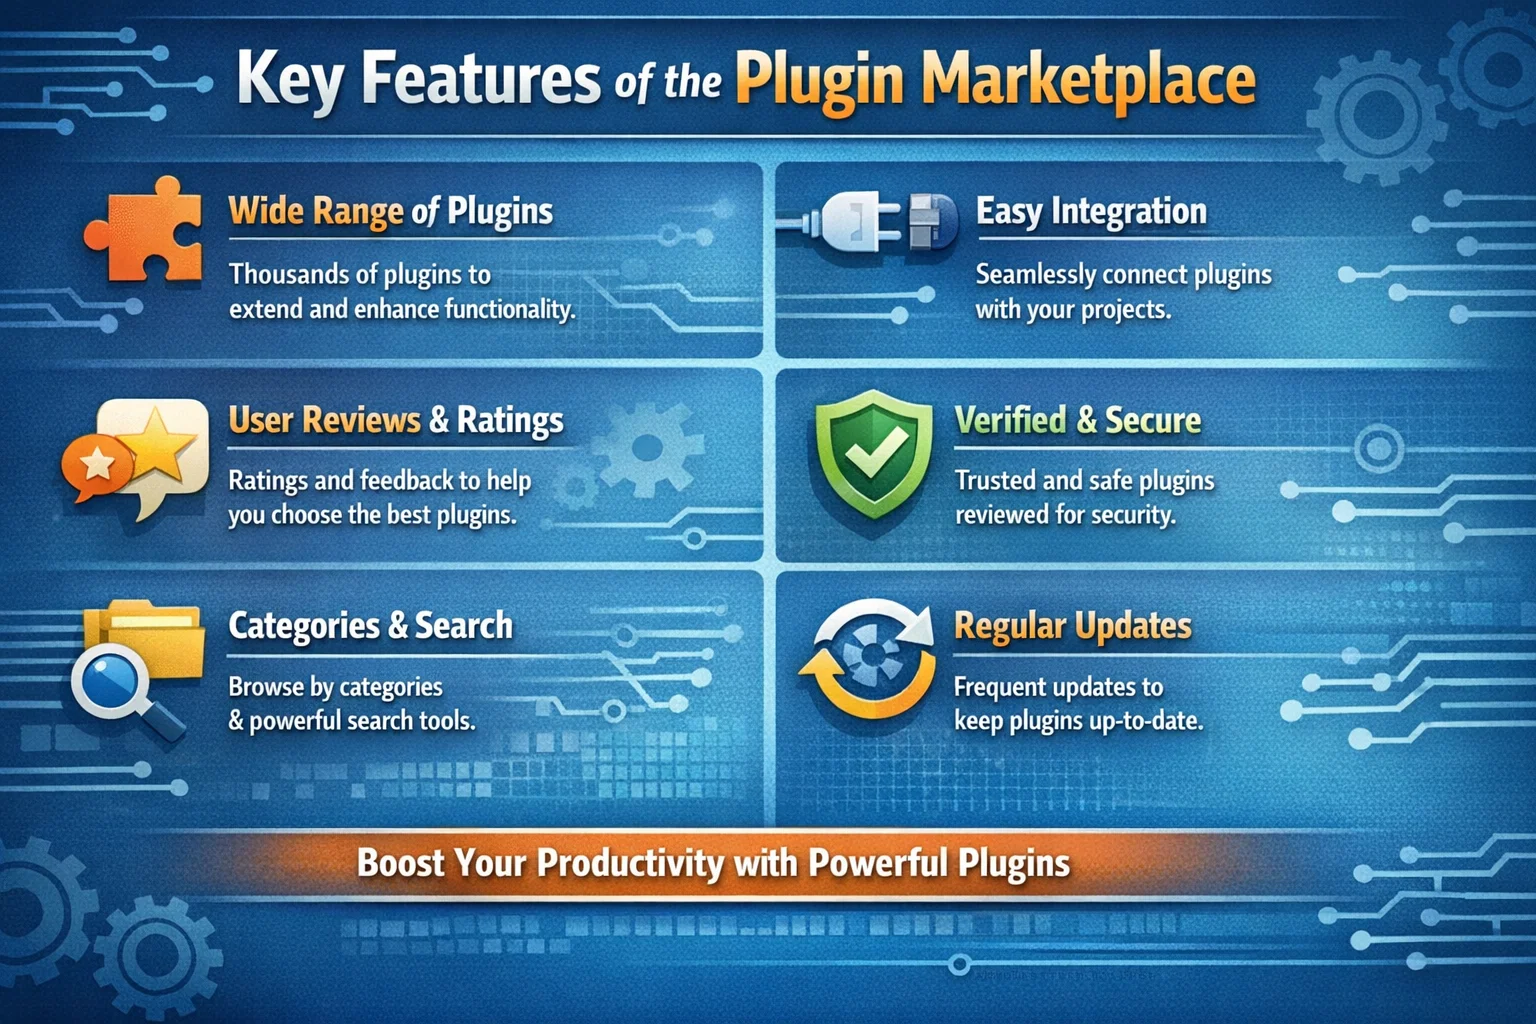
The recent launch of the Cursor plugin marketplace is a significant development in the field of artificial intelligence, enabling users to extend the capabilities of AI agents with external tools. As reported by FutureTools News, this innovative platform is set to transform the way AI agents are used in various industries. The plugin marketplace is designed to provide users with a wide range of tools and services that can be seamlessly integrated with AI agents, enhancing their functionality and performance.
Introduction to Cursor Plugin Marketplace
The Cursor plugin marketplace is an online platform that allows developers to create, share, and deploy plugins for AI agents. These plugins can be used to add new features, improve existing ones, or even create entirely new applications. With the launch of this marketplace, Cursor is providing a unique opportunity for developers to showcase their skills and creativity, while also contributing to the growth of the AI ecosystem. As mentioned on the Cursor blog, the plugin marketplace is an essential component of the company’s strategy to make AI more accessible and user-friendly.
Benefits of the Plugin Marketplace
The Cursor plugin marketplace offers several benefits to users, including the ability to extend the capabilities of AI agents, improve their performance and efficiency, and enhance their overall user experience. By providing access to a wide range of plugins, the marketplace enables users to tailor their AI agents to meet specific needs and requirements. This can be particularly useful in industries such as customer service, healthcare, and finance, where AI agents are increasingly being used to automate tasks and improve decision-making. As noted by experts in the field, the use of machine learning and natural language processing can significantly enhance the capabilities of AI agents.
Key Features of the Plugin Marketplace
The Cursor plugin marketplace features a user-friendly interface, making it easy for developers to create, deploy, and manage plugins. The platform also provides a range of tools and services, including APIs, SDKs, and documentation, to support plugin development. Additionally, the marketplace includes a review and rating system, allowing users to evaluate and compare plugins based on their quality, functionality, and performance. As stated by the GitHub community, the use of open-source plugins can significantly accelerate the development of AI applications.
The launch of the Cursor plugin marketplace is a significant milestone in the development of AI agents, and we are excited to see the innovative plugins that will be created by our community of developers. – Cursor Team
Future of AI Agents and Plugin Marketplaces
The launch of the Cursor plugin marketplace is a clear indication of the growing importance of AI agents and plugin marketplaces in the technology industry. As AI continues to evolve and improve, we can expect to see more innovative applications and use cases emerge. The use of cognitive services and conversational AI can significantly enhance the capabilities of AI agents, enabling them to interact more effectively with humans and perform complex tasks. As reported by FutureTools News, the future of AI agents and plugin marketplaces looks promising, with significant opportunities for growth and innovation.
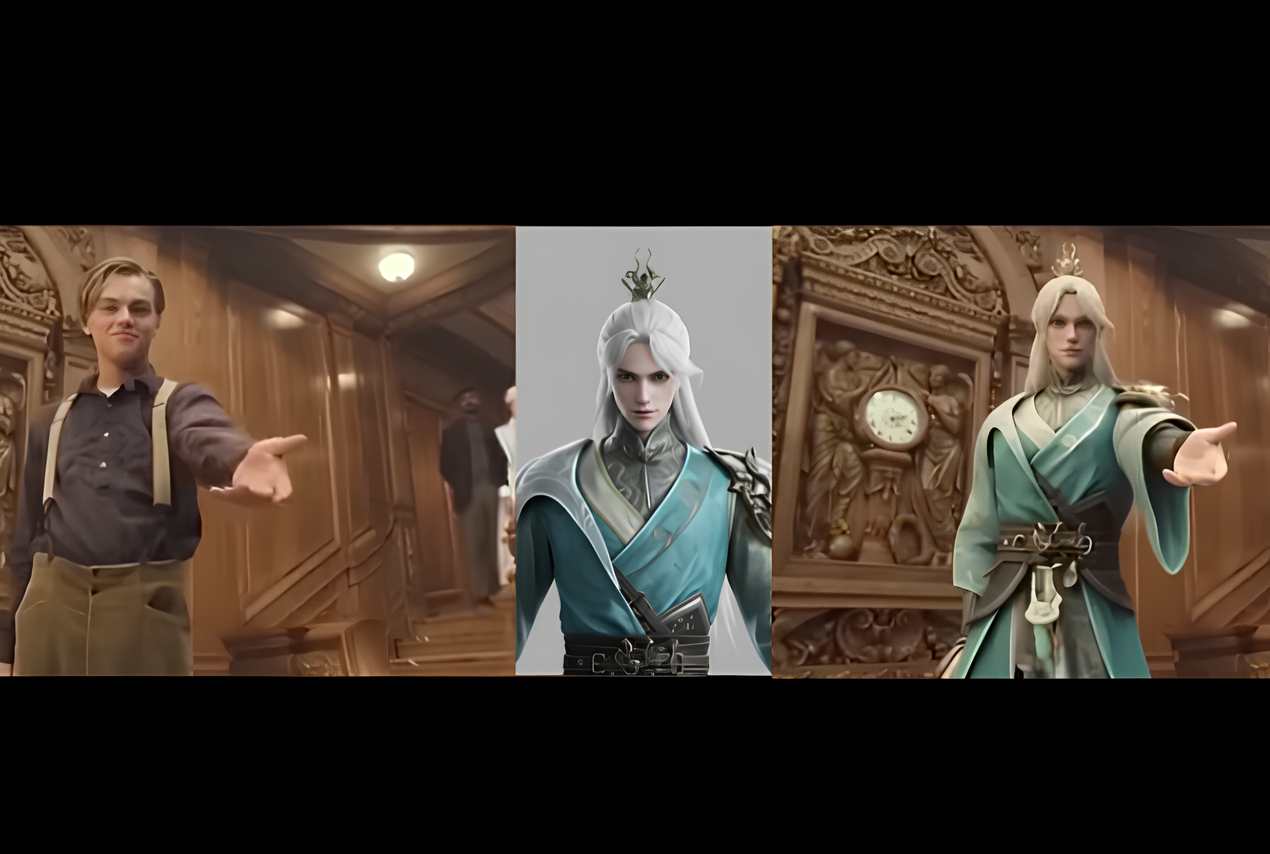
Ever wondered if you could take a scene from your favorite movie and seamlessly swap out the main character for someone entirely new, just using a single reference image? Thanks to the incredible advancements in generative AI, this is no longer science fiction. In this guide, we’ll explore the amazing capabilities of MoCha AI, a free and open-source tool that offers end-to-end video character replacement with stunning accuracy.
Swap any character in an existing video with a new one using a single reference image.
Developed by the “Orange Team,” MoCha AI is a powerful new framework that stands out for its ability to create high-quality, consistent character replacements without needing complex structural guidance. Let’s dive into what makes it so special and how you can use it yourself.
MoCha AI is a free, open-source AI tool designed to replace any character in an existing video using just a single reference image of a new character. Its advanced model is capable of capturing and transferring complex motions with incredible detail. The key features include:
Full Body Motion Transfer: It perfectly matches the movements of the original character, including subtle hand gestures and body language.
Facial & Lip Sync Fidelity: The new character’s facial expressions and lip movements are synchronized with the original audio and performance.
Seamless Integration: MoCha AI excels at matching the white balance, lighting, and colors of the original video. This ensures the new character blends into the scene naturally, avoiding the “pasted-on” look that other tools can produce.
Intelligent Segmentation: The tool is smart enough to identify and replace only the target character, leaving other elements like background scenery and even subtitles completely untouched.
How MoCha AI Stacks Up Against Competitors
While similar tools like Wan Animate and Kling also offer character animation, the video highlights several areas where MoCha AI demonstrates superior performance. In side-by-side comparisons, MoCha consistently produces more realistic and better-integrated results.
MoCha (labeled “Ours”) shows better color and lighting consistency compared to Kling and Wan-Animate.
The primary advantage is its ability to preserve the original scene’s color and lighting. In several examples, including a tricky scene with a moving lightbulb, MoCha’s output looks far more natural. The character feels like they are truly in the environment, whereas results from other models can appear washed out or poorly lit.
Furthermore, MoCha AI handles unconventional characters, like those wearing masks, much more effectively. In one test, Wan Animate failed to generate the masked character properly, while MoCha inserted it seamlessly, retaining all the details from the reference photo.
For those interested in exploring other powerful video manipulation tools, check out our comprehensive reviews in the AI Tools & Reviews category.
Getting Started: How to Install and Use MoCha AI with ComfyUI
The easiest way to run MoCha AI locally is through ComfyUI, a popular node-based interface for generative AI models. The video uses a custom wrapper node that makes the process straightforward.
Step 1: Install the WanVideoWrapper for ComfyUI
This entire workflow runs on the “ComfyUI-WanVideoWrapper,” a custom node developed by user Kijai. If you haven’t already, you need to install it in your ComfyUI’s custom_nodes folder. You can do this by cloning the repository from GitHub.
Once cloned, you’ll need to install its dependencies. If you use the portable version of ComfyUI, you can run the following command in your ComfyUI_windows_portable folder:
MoCha requires several models to function correctly. The workflow file handily includes the links, but here’s what you need:
The MoCha AI Model: The original model is quite large. Thankfully, there is a quantized FP8 version available which is smaller (around 14.3 GB) and works well for consumer GPUs. Download this and place it in your ComfyUI/models/diffusion_models/ folder.
VAE & Text Encoder: You’ll also need the Wan2.1 VAE and a UMT5 text encoder. Place the VAE in the ComfyUI/models/vae/ folder and the text encoder in the ComfyUI/models/text_encoders/ folder.
(Optional) LightX2v Model: To dramatically speed up generation, it’s highly recommended to download the LightX2v LoRA model. This can reduce the required steps from 20-30 down to just 6. Place this file in the ComfyUI/models/loras/ folder.
Step 3: Set Up the Workflow
Once all models are downloaded and placed in the correct folders, restart ComfyUI. Drag and drop the MoCha workflow JSON file onto the interface to load it. Now you can start setting up your generation!
Load Your Video: In the “Load Reference Video” node, upload the video you want to edit.
Create a Mask: The first step is to generate a segmentation mask to tell the AI which character to replace. The workflow guides you through this; you use green dots to select parts of the character and red dots to select parts of the background (or objects to exclude). This helps create an accurate mask.
Load Your Reference Image: Upload the image of the new character you want to insert into the video. For best results, use an image with a clean, simple background.
Generate! With everything set up, you can run the workflow. The MoCha AI will process the video frame by frame, replacing the original character with your new one while matching the motion and lighting.
The process can take some time depending on your hardware and video length, but the results are truly impressive, capturing everything from hand gestures to reflections on surfaces.
To dive deeper into the technical aspects or contribute to the project, you can visit the official MoCha AI GitHub page.
Final Thoughts: The Future of AI Video Editing
MoCha AI represents a significant leap forward for open-source character replacement tools. Its ability to create seamless, high-fidelity results opens up a world of creative possibilities for filmmakers, content creators, and AI enthusiasts. By leveraging the power of ComfyUI, it’s more accessible than ever to experiment with this cutting-edge technology right on your own computer. This is without a doubt one of the best character transfer tools available today.